Mastering the Procreate Watercolour Lettering Brush: A Practical Guide to Digital Calligraphy
Digital lettering has evolved from simple vector paths to rich, textured artistry that mimics traditional media. At the forefront of this shift is the Procreate Watercolour Lettering Brush, a tool designed to bridge the gap between analog fluidity and digital precision. For creators, marketers, and hobbyists alike, this brush offers a unique opportunity to produce smooth, pressure-sensitive typography that feels organic rather than manufactured. However, owning the right tool is only half the battle. Many users stumble not because the software is difficult, but because they overlook critical setup steps and hardware requirements.
Understanding the nuances of this specific brush set can save you hours of frustration. It is not merely a standard ink tool; it is a dual-color engine that reacts to your stylus pressure in complex ways. If you approach it with the same mindset as a basic round brush, you will miss its full potential. This guide walks you through the common pitfalls users face when adopting this workflow and provides clear, actionable advice to ensure your digital watercolor lettering looks professional from day one.
The Hardware Reality Check
The most frequent mistake beginners make is assuming compatibility across all tablets. Let us be unequivocal: this brush ecosystem is exclusive to the Apple ecosystem. Specifically, you need an iPad Pro running the Procreate App and an Apple Pencil. Attempting to use this brush on an Android tablet, a standard iPad without Pencil support, or with a third-party stylus will result in a broken experience. The brush relies on advanced pressure sensitivity data that only the Apple Pencil provides reliably within Procreate.
Why does this matter? Without genuine pressure sensitivity, the "watercolour" effect fails. The brush is engineered to vary opacity and size based on how hard you press. A capacitive stylus or a finger cannot replicate this nuance, leading to flat, uniform strokes that lack the artistic depth the brush promises. Before purchasing or downloading, verify your hardware. If you do not have an iPad Pro and Apple Pencil, this specific tool is not for you, and investing time in learning it would be inefficient. Consider alternative apps or brushes designed for broader hardware compatibility instead.
Navigating the Installation Process
Once you have the correct hardware, the next hurdle is installation. Digital assets often come compressed, and many users get stuck at the file management stage. You will typically receive a zip file containing the brush set and the accompanying palette. You cannot import a zip file directly into Procreate. You need a platform to download the files, such as iCloud, and a utility to unzip them, like iZip or the native Files app on iOS.
A common error here is skipping the unzipping step or trying to open the file in an unsupported viewer. Always ensure the files are extracted into a accessible folder on your iPad. Once unzipped, tap the file to share it directly to Procreate. It will automatically create a named folder within your brush library. If you skip this organization step, you may lose track of your new tools amidst hundreds of default brushes. Taking two extra minutes to organize your imports ensures a smoother workflow later.
Unlocking the Dual-Color Mechanism
The standout feature of this brush is its dual-color capability. Unlike standard brushes that pick a single foreground color, this tool blends two hues simultaneously. However, this feature confuses many users who wonder why their lettering looks muddy or incorrect. The issue usually lies in color selection.
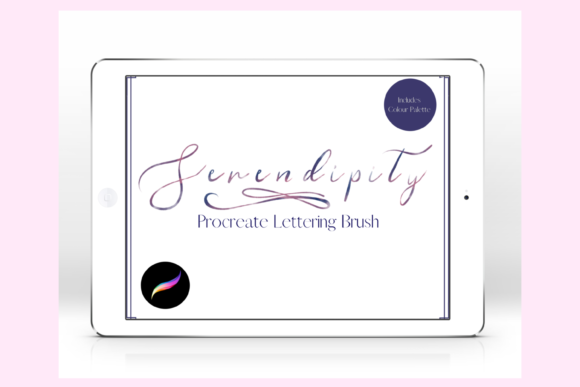
To utilize this feature effectively, you must understand how Procreate handles dual colors. The brush includes a custom Serendipity colour palette, designed specifically to complement these dual tones. Here is the correct workflow:
- Set the Serendipity palette as your default in Procreate.
- Navigate to the ‘harmony classic disc’ within the color picker.
- Tap one of the two color boxes to switch your active dual-color choice.
If you ignore the included palette and pick random colors from the spectrum, the blending algorithm may produce unappealing results. The Serendipity palette is curated to ensure that the two colors harmonize rather than clash. For instance, pairing a deep indigo with a soft lavender creates a natural shadow-and-highlight effect within a single stroke. Randomly pairing red and green, however, might result in a murky brown. Trust the curated palette initially to understand how the brush behaves before experimenting with custom combinations.
Adjusting Size and Opacity for Best Results
Versatility is a key selling point, but it requires manual adjustment. The brush responds dynamically to the size and opacity sliders. A frequent oversight is leaving these settings at default values regardless of the canvas size. If you are working on a large poster design, the default brush size may appear too thin and delicate. Conversely, on a small social media graphic, it might look overly bulky.
Always adjust the slider before you begin lettering. Start with a mid-range opacity to allow for layering. One of the beauties of digital watercolor is the ability to build depth. By keeping opacity lower, you can overlap strokes to create darker, richer areas where letters intersect, mimicking the way real watercolor pigment pools on paper. If you set opacity to 100% immediately, you lose this translucency, and the artwork will look flat and digital.
Avoiding the "Perfect Stroke" Trap
Many creators struggle with the expectation of perfection. In traditional watercolor, mistakes are part of the charm. In digital art, the undo button tempts us to refine every curve until it is mathematically perfect. This approach kills the organic feel of the Procreate Watercolour Lettering Brush. The brush is designed to have a slight texture and variability. Embrace it.
Instead of endlessly erasing and redrawing, focus on the flow of your hand. Use the Apple Pencil’s tilt function if supported, though pressure is the primary driver. Practice loose, confident strokes. If a line isn’t perfect, let it sit. Often, the slight imperfections add character and authenticity to the piece. Over-editing can strip away the very qualities that make watercolor lettering appealing: its human touch.
Final Thoughts on Workflow Efficiency
Integrating this brush into your routine requires a shift in mindset. It is not just a tool; it is a simulation of a physical medium. Respect the hardware limitations, follow the installation protocols strictly, and lean on the provided color palettes to guide your aesthetic choices. By avoiding the common traps of incompatible hardware, improper file handling, and poor color selection, you unlock a powerful asset for your creative toolkit.
Whether you are designing logos, creating social media content, or exploring personal art projects, mastering this brush elevates your output. It allows you to communicate warmth and elegance in a digital space that often feels cold and rigid. Take the time to experiment with the pressure sensitivity and dual-color interplay. The results are worth the initial learning curve, offering a sophisticated, hand-crafted look that stands out in a crowded digital landscape.